The heat is on in Frankfurt. I ought to be ashamed of myself for
not being able to withstand 25 degrees Celsius since I’m from Singapore.
My excuse is that the tiny island is well equipped with
air-conditioning. You could shop on Orchard Road without ever seeing the
sun for goodness sake!
Here’s what we’ll be expecting this week in Frankfurt. Temperatures
are up and although I don’t take the heat as well as Daniel, I love
clear skies and plenty of sunshine. You won’t find me tanning myself
though.
When I asked Daniel what he fancied for dinner on a hot day, he
suggested mixed salad with rice. It reminded him of what he would get
when they get their occasional heatwave in the UK.
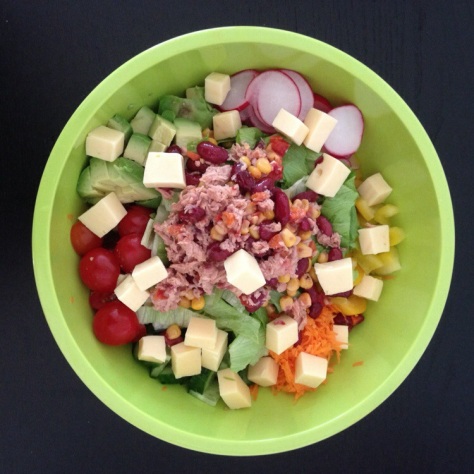
Here’s a list of ingredients we used in our mixed salad which by the way is perfect for any hot day.
Ingredients (serves 4)
Iceberg salad (lettuce)
1 yellow pepper, chopped
3 small carrots, grated
5 radish, thinly sliced
Half a cucumber, sliced
1 avocado, chopped into cubes
1 tin of tuna mixed with kidney beans and corn
A handful of cherry tomatoes, halved
Gouda cheese, cut into cubes (or any cheese you prefer)
Instructions
Mix the ingredients all in a huge bowl. Add salad dressing only after
you’ve dished up. This is so you can keep the remaining salad without it
becoming all soggy overnight.
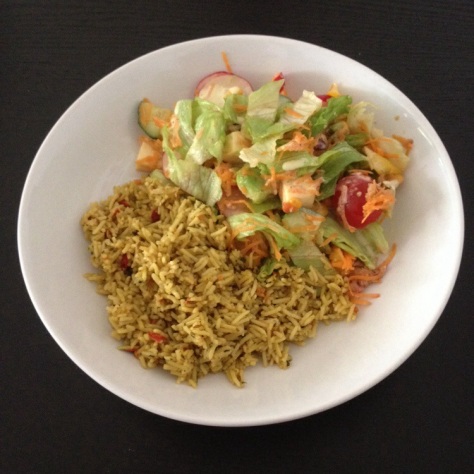
To make it a more substantial meal, we heated up some Uncle Ben’s
Basmati Rice with Curry. You could serve it with a bread roll or long
grain rice. Or, just help yourself to more salad if you want to omit
carbs.
The different
ingredients used gave the salad an excellent texture. While the avocado
was softer (more of a creamy texture), the pepper added crunch to the
salad overall. And since it was so light, it does help cool is down on a
hot day. Always a bonus to NOT stand in front of a cooking stove too!
What do you like to have on a hot day? Feel free to suggest a recipe or two in the comments section below!
Yoyo's Kitchen Adventures
Where we have fun in the kitchen trying and testing all the great recipes out there
19 May 2014
15 May 2014
Soba Salad with Honey Soy Sauce
With temperatures looking like they will soar slightly over the next
couple of weeks, I'm really eager to share with you a tried and tested
Soba Salad with Honey Soy Sauce recipe.
Soba is one of my favourite Japanese noodles. It's made out of buckwheat and you'll just need to boil the noodles according to the instructions on the packaging. If you live in Frankfurt, soba is readily available at all Asian supermarkets.
This recipe was adapted from Just One Cookbook (my favourite online Japanese cooking resource).
Firstly, here's the list of ingredients for the sauce (For original recipe, please see here.)
1 Tbsp. canola or grapeseed oil
3 Tbsp. sesame oil
½ tsp. mixed chilli & pepper
3 Tbsp. honey
3 Tbsp. soy sauce
Other Ingrediants
3-4 bundles of soba noodles (serves 4)
1 spring onion
2 medium carrots, grated
Instructions
1. Mix the oil, mixed chilli and pepper and sesame oil in a small sauce pan. Heat it on medium heat for 10 minutes.
2. In a separate bowl, mix the honey well with the soy sauce.
3. When the oil mixture is done, carefully mix it with the honey and soy sauce. Whisk well to ensure that the honey is dissolved.
4. Cook the soba noodles according to the instructions on the packaging (no need to add salt!). Once it's cooked, run it under cold water and set aside to drain.
5. In a big bowl, mix the soba, spring onions, carrots and honey soy sauce. Toss the mixture well and serve either cold or at room temperature.
Although I had this for lunch on a day with a maximum of only 14 degrees Celsius, I can imagine how refreshing the noodles would be on a hot summer's day. I love it so much that I'm serving it for dinner as a main dish with a couple of pan-fried salmon fillets.
 |
| Refreshing Soba Salad, perfect on a hot summer's day. |
Soba is one of my favourite Japanese noodles. It's made out of buckwheat and you'll just need to boil the noodles according to the instructions on the packaging. If you live in Frankfurt, soba is readily available at all Asian supermarkets.
This recipe was adapted from Just One Cookbook (my favourite online Japanese cooking resource).
Firstly, here's the list of ingredients for the sauce (For original recipe, please see here.)
1 Tbsp. canola or grapeseed oil
3 Tbsp. sesame oil
½ tsp. mixed chilli & pepper
3 Tbsp. honey
3 Tbsp. soy sauce
Other Ingrediants
3-4 bundles of soba noodles (serves 4)
1 spring onion
2 medium carrots, grated
Instructions
1. Mix the oil, mixed chilli and pepper and sesame oil in a small sauce pan. Heat it on medium heat for 10 minutes.
2. In a separate bowl, mix the honey well with the soy sauce.
3. When the oil mixture is done, carefully mix it with the honey and soy sauce. Whisk well to ensure that the honey is dissolved.
4. Cook the soba noodles according to the instructions on the packaging (no need to add salt!). Once it's cooked, run it under cold water and set aside to drain.
5. In a big bowl, mix the soba, spring onions, carrots and honey soy sauce. Toss the mixture well and serve either cold or at room temperature.
Although I had this for lunch on a day with a maximum of only 14 degrees Celsius, I can imagine how refreshing the noodles would be on a hot summer's day. I love it so much that I'm serving it for dinner as a main dish with a couple of pan-fried salmon fillets.
11 May 2014
Deep-Fried Elder Berry
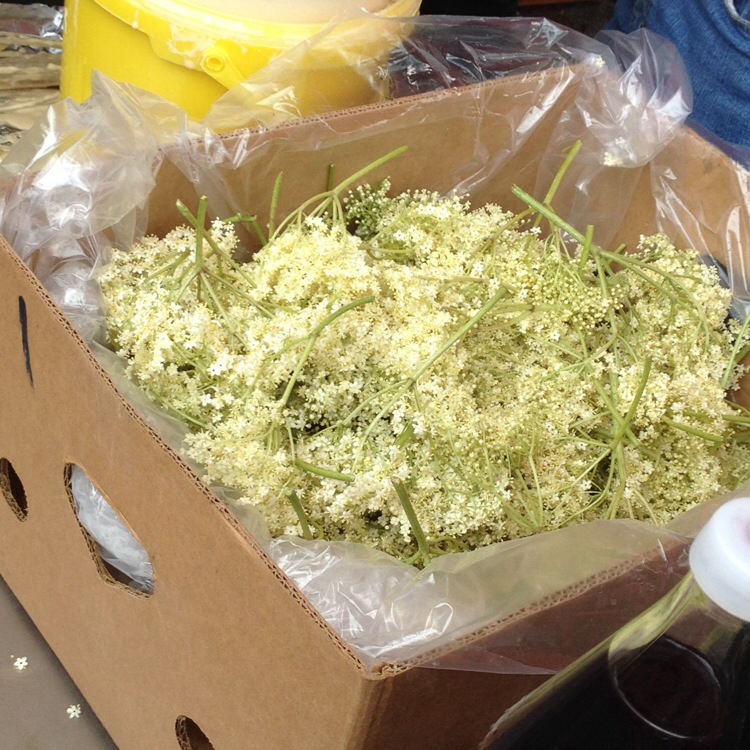 |
| Elder Berry Flowers - Holunder |
I love visiting the Farmers' Market at Konstablewache in Frankfurt on Saturdays. The market is ever so vibrant. It is little wonder that it attracts the locals and tourists alike.
At the market, you'll be treated to many fresh produce such as vegetables, meat, poultry, cheese, fish and so on. It also prides itself in selling traditional German food such as wursts (sausages), Schnitzels and breads. I was really excited when i found a stall selling deep-fried holunder flowers. I love elder berry for its natural sweetness. It is often used to make jam, juice and even champagne!
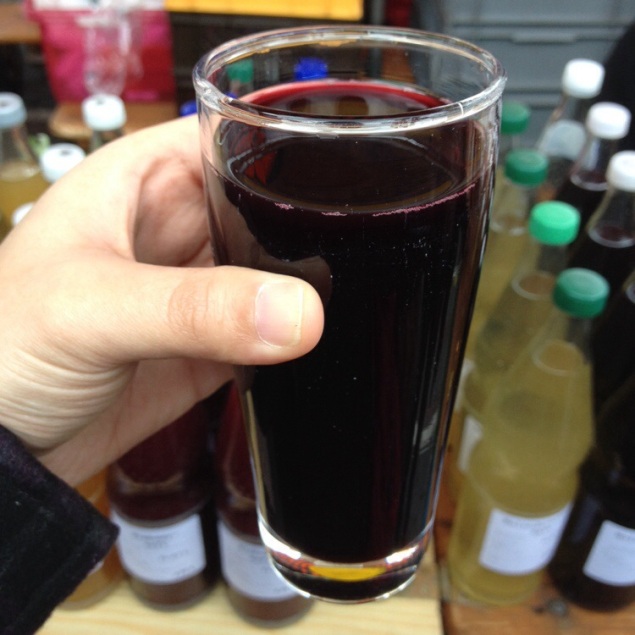 | |||
| My glass of fresh elder berry juice. It is so much better than the cartons of juice you find in supermarkets! |
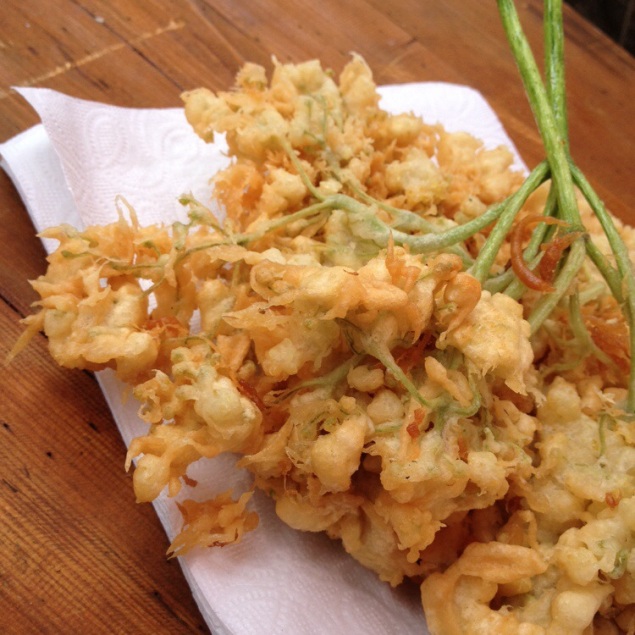
My highlight on Saturday was deep-fried elder berry flowers. Yes, deep-fried flowers! I've not had anything like that before but I love holunder so much that I had to savour it!
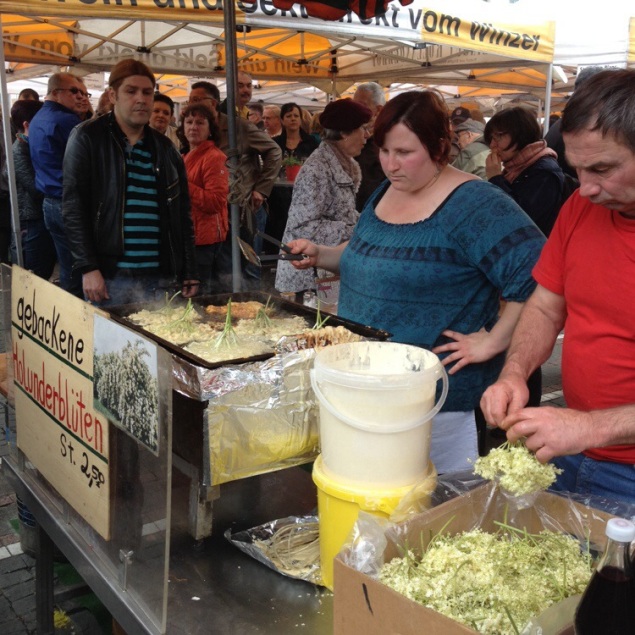
The man grouped the flowers in a bunch and the lady was responsible for frying the flowers. She's so skilled! All the holunder were fried to perfection. The once soft petals were then covered in crispy, golden-brown batter.
 |
| Deep-fried to perfection! Crispy and golden-brown! |
If you're in Frankfurt on a Thursday or Saturday, you'll have to visit this market at Konstablewache. You will LOVE it!
3 May 2014
Basil Pesto
One evening, Daniel entered the front door looking all excited to share with me a big piece of news – his colleague made AMAZING basil pesto for lunch. It was so good that my husband couldn’t stop raving about it. If you know the saying “the way to a man’s heart is through his stomach”, I was beginning to worry that this pesto treat was turning into an office bromance.
When he brought home some for me to sample, it finally dawned upon me that I couldn’t fault my husband for his moment of “infidelity”. At that instance, even my faithful mind cheated on him (with the pesto, of course). I requested Daniel to ask for the recipe since we can’t be knocking on someone else’s door demanding pesto. His colleague was very kind to share with us this wonderful recipe which I think deserves more attention.
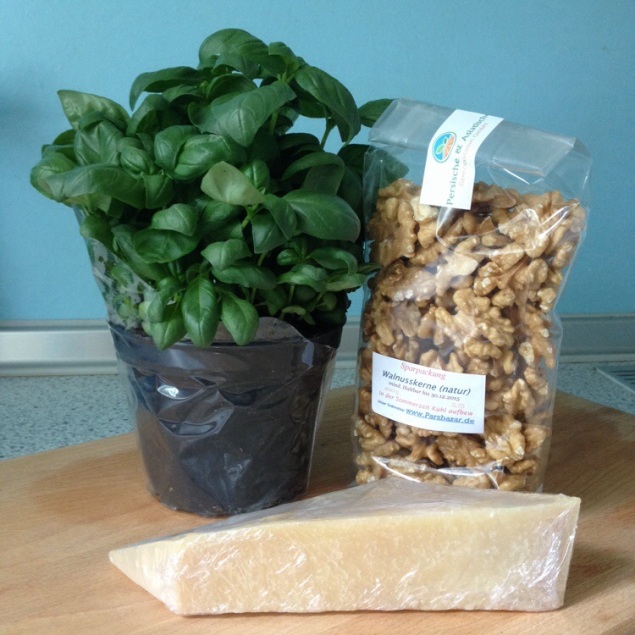
Off to the farmers’ market I went to get a pot of fresh basil. With such high standards to meet, I chose the pot with vibrant leaves and smoothest texture to achieve a richer flavour. Fresh basil is THE key ingredient!
Instead of pine nuts, we used walnuts as recommended by his colleague. I bought a pack of them from a Persian stall in Frankfurt’s Kleinmarkthalle.
As for the Parmesan cheese, I bought a 220g block from a cheese specialist at Kleinmarkthalle for €7,41. It’s definitely a lot more expensive than the pre-grated packet ones you get at supermarkets. However, we really wanted freshly grated cheese for this heavenly sauce! I reckon it will be cheaper elsewhere too but we were playing tourists at Kleinmarkthalle.
Ingredients (serves 4-6)
1 cup of basil leaves
1 cup of walnuts
1 cup of freshly grated Parmesan
1 clove of garlic
2 tbsp of olive oil
Black pepper, grounded
Instructions
1. Blend basil leaves, garlic, walnuts, Parmesan and grounded black pepper in a mixer. It will become like a paste.
2. In a bowl, mix the paste with olive oil.
Note: Feel free to adjust the amount of olive oil used to achieve the consistency you like. Add more olive oil if you’re using it for pasta. If you prefer more or less of certain ingredients, do adjust the recipe accordingly. Nothing is set in stone here!
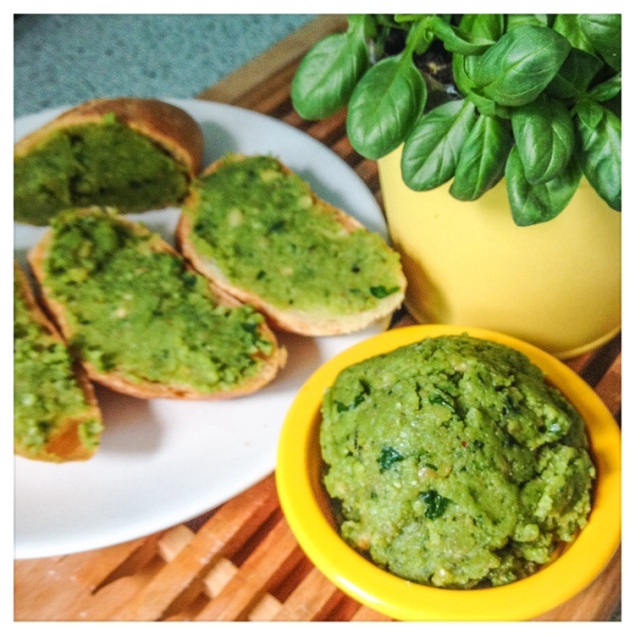
Mission accomplished! The recipe worked extremely well for us and it was so easy to follow too. We had the pesto on a few slices of baguette and wrapped the leftover in cling-film for pasta tomorrow.
1 May 2014
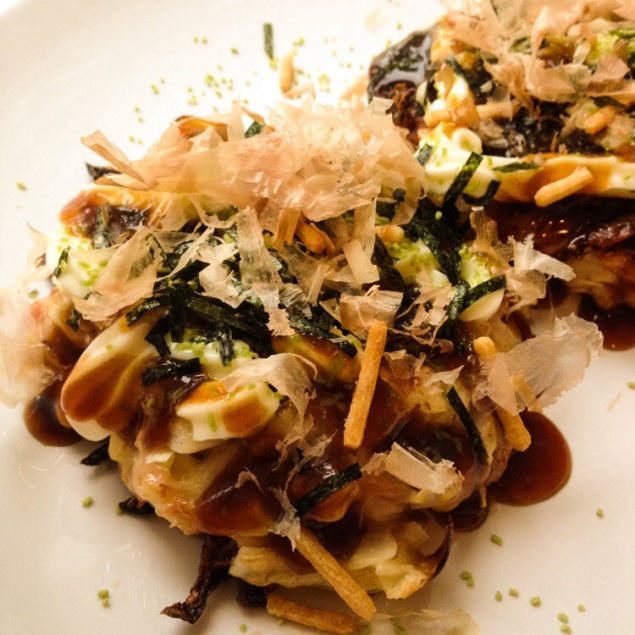
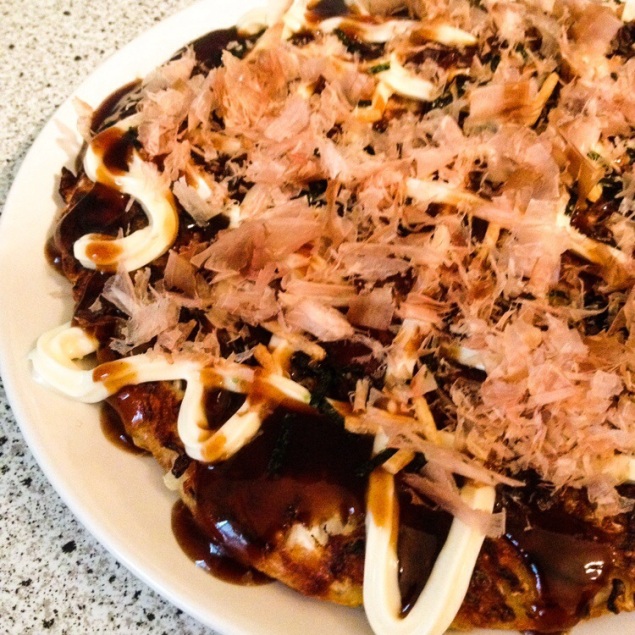
Okonomiyaki
A few weeks back we had an okonomiyaki party at a friend’s place. It was so much fun and I realised how easy it was to make this Japanese pizza-like dish. When I got home, I searched online for a good recipe as my friend didn’t measure any of her ingredients (what an expert!).
Today I’ll share with you a basic and easy okonomiyaki recipe that allows you to be versatile in whatever ingredients you might want to use. I love Marc’s recipe because he teaches you the basics which then gives you room to improvise. It’s pretty much what I think cooking is about – it isn’t set in stone.
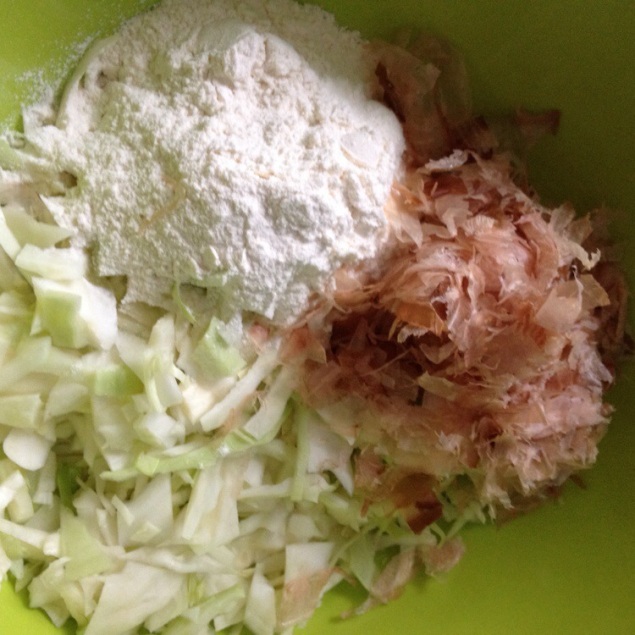
In my version, these are the ingredients I used in addition to the basic recipe based on 4 serving portions.
125g bacon bits
60g Parmesan cheese
60g mozzarella
1 medium-sized tin of tuna
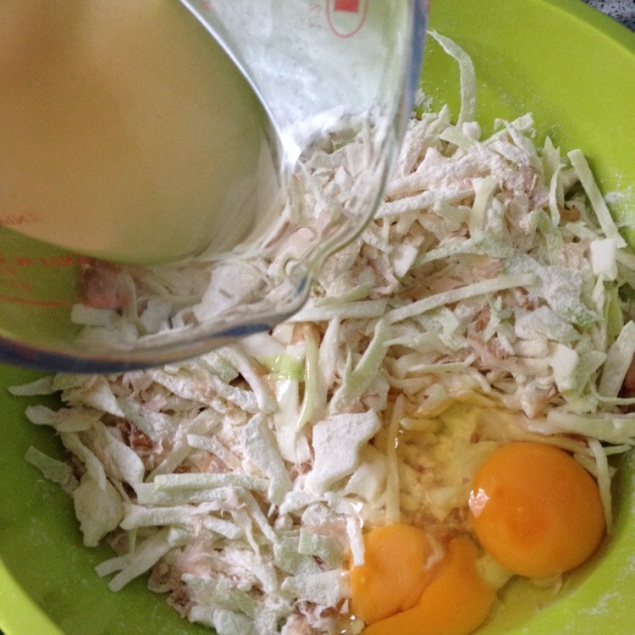
Step 1: Mix all the dry ingredients together.
Step 2: Add the eggs and dashi (stock).
Step 3: Add bacon bits and tin of tuna.
Step 4: Mix the ingredients well and ensure that they are well coated with the basic batter.
Step 5: Scoop a ladle of the mixture into a frying pan with oil which is heated to medium-high heat. Cook covered with a lid for 7 minutes. The bottom should be brown and then repeat the same for the other side.
Step 6: Serve on a plate. Garnish it with mayonnaise, okonomiyaki sauce, aonori (or just use regular seaweed – aonori is soooooo expensive in Frankfurt!), katsuobushi and red Japanese ginger (I omitted it as the Asian supermarket I visited didn’t have any in stock).
Don’t be put off by the steps involved. It’s a really easy recipe to follow. Just dump all the ingredients in a huge bowl and pan-fry it, how tough can that get, right?
25 April 2014
Sausages with Sticky Onion Gravy
Living in the land of sausages, one of my favourite sausages is the Nürnberger sausage. It originated from the city of Nürnberg. Made from coarsely ground lean pork and usually seasoned with marjoram, salt, pepper, ginger, cardamom, and lemon powder, these sausages are thin and small. The Germans usually serve them with sauerkraut and potatoes. To improvise, I served them with a slight British flair – Sticky onion gravy, Yorkshire puddings and beans.
I rely heavily on BBC Good Food for my British recipes. Hence, it is no surprise that the recipe for Sausages with Sticky Onion Gravy comes from them too.
The gravy was not only flavoursome but also aromatic. The mixture of thyme, sugar and splash of Worchetershire sauce gave the gravy its rich taste which complimented the sausages.
The Yorkshire pudding recipe which I’ve featured on my blog before was also from BBC Good Food. Unfortunately, I’ve yet to get myself Yorkshire Pudding tins or even a muffin tin. I’m still stuck with my mini-cupcakes tin which explains the oddly shaped Yorkshire Puddings. I promise you the taste isn’t compromised though!
Daniel appeared to enjoy homecooked British food. I must admit I don’t cook English food as often as I perhaps should. He must have had 8-9 mini Yorkshire Puddings and 7 sausages!
15 April 2014
Easter Nests
With Easter just round the corner, have you thought of what treats you’ll be making?
I wanted to make some easy no-bake chocolate treats for Dan’s colleagues since bending over to reach the oven has now become quite a challenge for me. So, Easter Nests is it for them!
Ingredients
150g Shreddies cereal (mashed)
200g chocolate, melted
1 pack of mini eggs (I used 48 mini eggs in total)
Method
1. Use your hands or a blender to mash the Shreddies in a large mixing bowl.
2. Melt the chocolate (you can use a microwave or a saucepan)
3. Pour the chocolate into the mashed Shreddies and use a spatula to mix well. Ensure that the Shreddies are well coated in chocolate.
4. Depending in the size of your cupcake moulds, use either a teaspoon or tablespoon to fill each mould with the chocolate coated Shreddies. I used a mini-cupcake mould.
5. Place two to three mini eggs into each cupcake holder. Make sure you push them downwards slightly into the Shreddies.
6. Refrigerate for 2 hours to allow them to set.
I hope you’ll have fun this Easter! We’re so looking forward to the long weekend!
11 April 2014
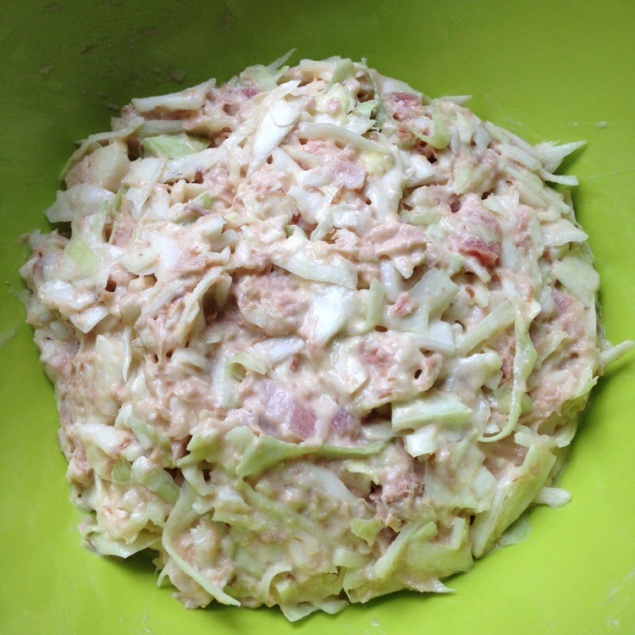
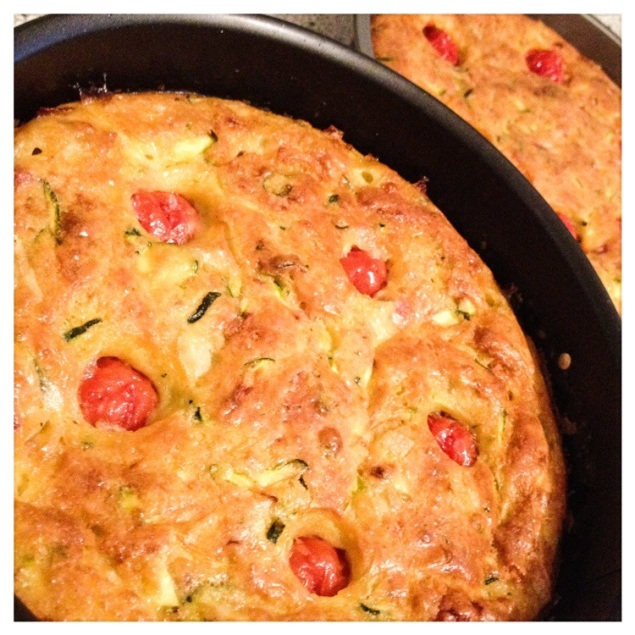
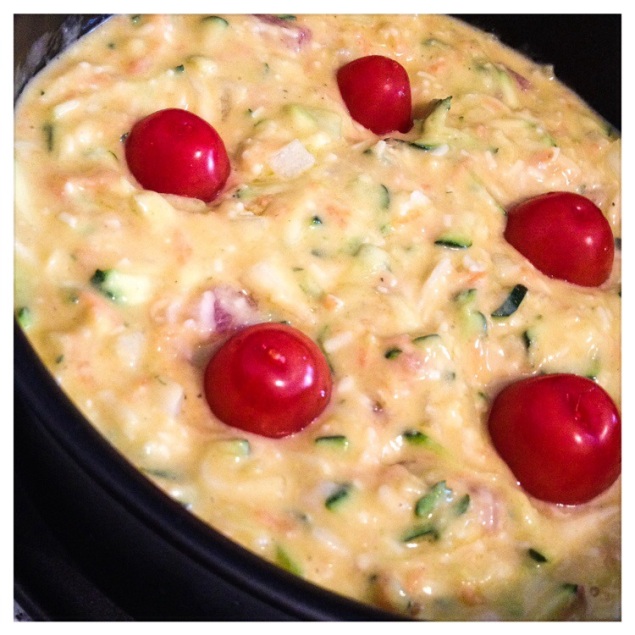
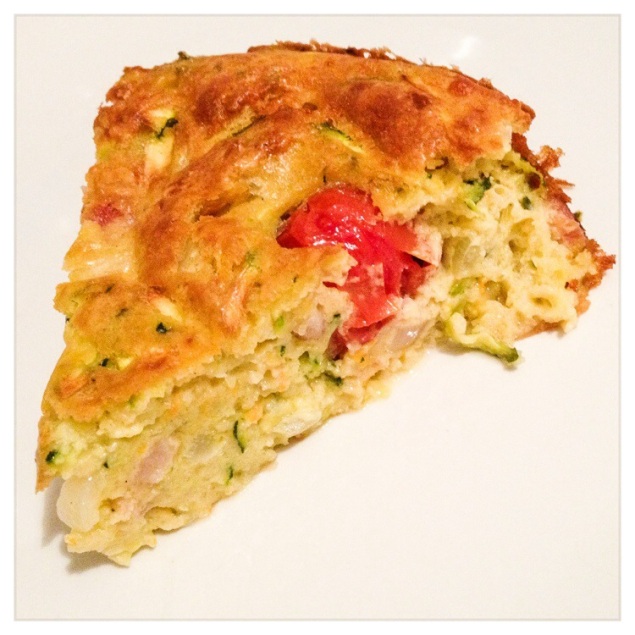
Homemade Quiche
Firstly, I would like to say a big thank you to Sarah of Backpack Bees for sharing her quiche recipe with me. I was complaining on the lack of variety available in German supermarkets and Sarah volunteered to make a quiche to show me how easy it was. She was so right!
Unlike other quiche that involves making a crust, Sarah knew that I would prefer a all ingredients in one bowl recipe. This made things a lot simpler for me. I threw in all the ingredients in a huge mixing bowl and dished it into a cake tin. It worked perfectly too. I didn’t want to spend money on getting a tin specially for baking a quiche for the first time. However I did buy a new measuring jug that measures in cups! Now I can try out more recipes from American sites without converting numbers online.
I followed Sarah’s recipe very closely and baked the quiche for 45 minutes at 200 degrees Cels in the oven. Greedy me did add some shredded mozzarella cheese though since I had them in the fridge.
The quiche tasted heavenly! So much better than the ones I get from the supermarkets in Germany. I love how versatile the recipe can be too. Instead of courgette (or zucchini), I’ll try making it with leeks and broccoli next time. I’m so looking forward to making a variety of quiche!
As Sarah said in her blog post, you can omit bacon/ham if you prefer a vegetarian option.
For Sarah’s recipe, please do visit her blog at this link (Quiche recipe).
8 April 2014
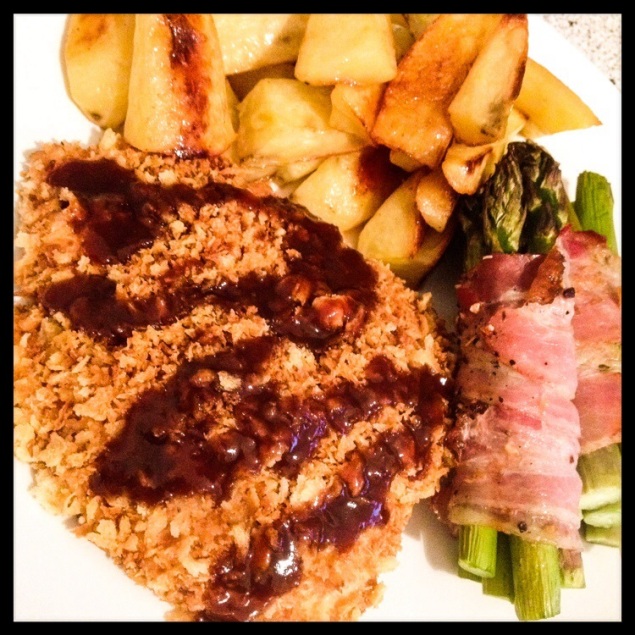
Crispy Baked Chicken
Remember me saying I was going to try Just One Cookbook’s Crispy Baked Chicken recipe? I’ve tried Nami-san’s delicious Tonkatsu recipe and homemade tonkatsu recipe (here’s my post for it) and really loved it. However, I wanted a healthier version. I’m really glad that she has an oven baked version of it!
I served the crispy baked chicken with homemade chips, bacon wrapped asparagus and homemade Tonkatsu sauce. It was definitely healthier, less cleaning up and very crispy. It was also very easy to cook, so do give the recipe a try!
28 March 2014
Blueberry Cream Cheese Muffins
On Thursday afternoon, I thought it would be a good idea to grab a muffin and cold drink from Starbucks in town for a quick lunch amidst all the errands I had to run. It turned out to be a rather dissatisfying Raspberry Cream Cheese muffin which had NO raspberries in it whatsoever. Not a single one. It tasted just like a badly baked vanilla muffin.
Here’s a photo of the Starbucks muffin. I didn’t even bother taking photos of what it looked inside since there was nothing.
Should I be surprised? Perhaps I’m pampered by the many cafés in Frankfurt that actually sell homebaked delicacies to appreciate Starbucks anymore.
To satisfy my craving, I made my own muffins instead. However, the supermarket I went to didn’t have raspberries so I baked the muffins with blueberries instead. Here’s my rule: if you’re going to name it a raspberry cream cheese muffin, Starbucks should have made sure that there were raspberries in it. Hence, when I baked these muffins, I went nuts with the ingredients. Probably something a huge commercial café like Starbucks couldn’t afford to do.
Here’s how the inside of the muffin I baked looks like. Yes, I love packing it with blueberries and a good amount of cream cheese!
Thankfully these muffins are NOT difficult to bake. I love to have homebaked muffins every so often for breakfast on weekends or when we have an excursion. They are such lovely snacks to have on long train journeys.
If you’re also interested in baking your own raspberry/blueberry cream cheese muffins, here’s the link to the recipe I used. There are plenty of fanciful recipes out there but all I was searching for today was a simple one. This proved to worked well for me and I hope it will for you too.
Subscribe to:
Posts (Atom)


