28 March 2014

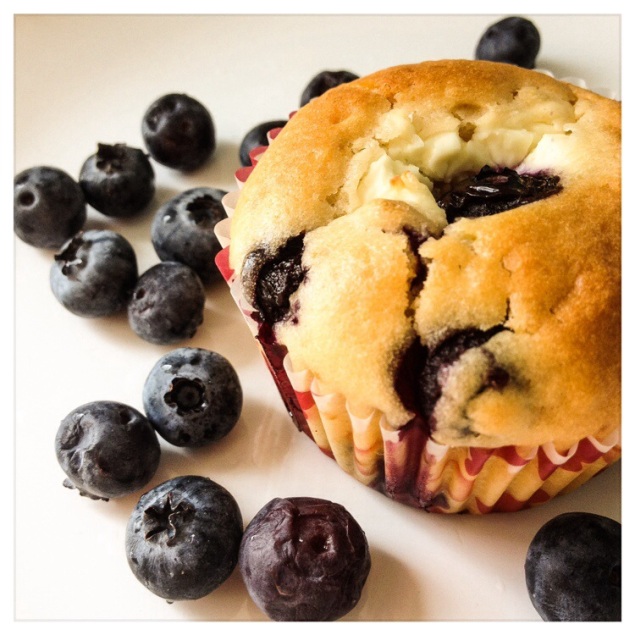
Blueberry Cream Cheese Muffins


20140328-152237.jpg
Note: Link to recipe can be found at the end of this post.

On Thursday afternoon, I thought it would be a good idea to grab a muffin and cold drink from Starbucks in town for a quick lunch amidst all the errands I had to run. It turned out to be a rather dissatisfying Raspberry Cream Cheese muffin which had NO raspberries in it whatsoever. Not a single one. It tasted just like a badly baked vanilla muffin.

Here’s a photo of the Starbucks muffin. I didn’t even bother taking photos of what it looked inside since there was nothing.

20140328-152630.jpg

Should I be surprised? Perhaps I’m pampered by the many cafés in Frankfurt that actually sell homebaked delicacies to appreciate Starbucks anymore.

To satisfy my craving, I made my own muffins instead. However, the supermarket I went to didn’t have raspberries so I baked the muffins with blueberries instead. Here’s my rule: if you’re going to name it a raspberry cream cheese muffin, Starbucks should have made sure that there were raspberries in it. Hence, when I baked these muffins, I went nuts with the ingredients. Probably something a huge commercial café like Starbucks couldn’t afford to do.

Here’s how the inside of the muffin I baked looks like. Yes, I love packing it with blueberries and a good amount of cream cheese!
20140328-153426.jpg

Thankfully these muffins are NOT difficult to bake. I love to have homebaked muffins every so often for breakfast on weekends or when we have an excursion. They are such lovely snacks to have on long train journeys.

If you’re also interested in baking your own raspberry/blueberry cream cheese muffins, here’s the link to the recipe I used. There are plenty of fanciful recipes out there but all I was searching for today was a simple one. This proved to worked well for me and I hope it will for you too.

21 March 2014

Vegetable Tempura

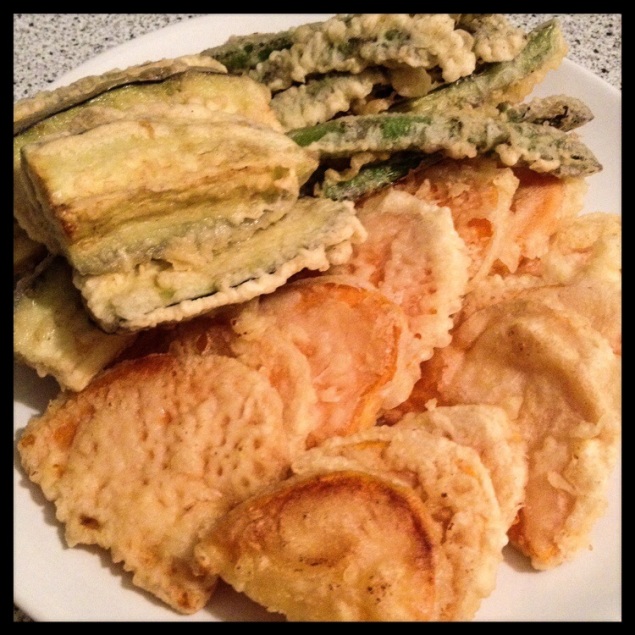
One of the set dishes I always order at a Japanese restaurant is Vegetable Tempura. I love the crispy batter and how it soaks up the tasty tempura sauce. As I’m currently in the phase of experimenting and learning how to cook Japanese cuisine, I made Vegetable Tempura for dinner.

20140321-141419.jpg

I like cooking to be fuss-free. Ideally, I should be able to get all the ingredients from the 4 different German supermarkets within walking distance from my apartment on a weekday. When I decided to make tempura, I wasn’t sure if I could get tempura flour. Therefore I was thrilled to learn from Just One Cookbook that I could make my own batter at home! So convenient and definitely cheaper too!

I didn’t exactly use the same vegetables as Nami-san’s recipe but I’m glad they still turned out well. As we only get asparagus in Spring in Germany, I was quick to get a bundle the moment I saw them. I also used sweet potatoes and an eggplant (aubergine). It turned out to be a feast for Daniel and I.

The tempura was crispy and so much less oily than what you would get in restaurants. I never reuse frying oil because I simply can’t bear the thought to, so I would like to think that deep-frying at home is cleaner than the ones you get outside.

Nami-san also provided the recipe for tempura sauce on her blog. Seriously, does she need to buy any bottled sauces? She seems to know how to make everything from scratch and make it look so easy!

As it was a slightly warm Spring Day, I served the lovely tempura with Zaru Soba. Ahhhh… Refreshing it was! Unfortunately I didn’t have all the ingredients to make the dipping sauce for the soba so I took the easy way out and used bottled Mentsuyu.
20140321-143224.jpg

If you’re a vegetable tempura lover, do try the recipe out at home. You’ll love it!

Any packet of soba will give you cooking instructions but I found the detailed instructions on Just One Cookbook really good to ensure I get the texture right.

Here are the links to the recipes.
Vegetable Tempura & sauce recipe
Zaru Soba recipe
I hope you’ll enjoy the vegetable tempura and Zaru soba as much as I did!

14 March 2014

Macaroni Cheese - Jamie Oliver

Once a week I like to whip up a vegetarian dinner. However the meal still needs to be hearty and filling. Therefore, I made Macaroni Cheese based on Jamie Oliver’s recipe.

I adapted his recipe since I was shopping at a nearby supermarket which had neither cheddar nor parmesan. As cooking isn’t set in stone, I used mozzarella and emmentaler. Also, I blended 3 slices of bread to get fresh breadcrumbs.
Here’s how it looked before it went into the oven for 30mins.

20140313-201127.jpg

And tadahhhhh!!!! Golden brown and crispy top!

20140314-041128.jpg

I halved the recipe to serve 4-5 but the two of us managed to eat about 3 people’s worth of it. Shows you more morish this simple but delightful dish can be.

20140314-041340.jpg

Once again, this is another fuss-free and successful Jamie Oliver recipe.
How about making some in your kitchen this weekend? Here’s the recipe!

Ingredients (Serves 8 - 10)

  • sea salt
  • freshly ground black pepper
  • 45 g butter
  • 3 heaped tablespoons plain flour
  • 10 cloves garlic, peeled and finely sliced
  • 6 bay leaves
  • 1 litre semi-skimmed milk
  • 600 g dried macaroni
  • 8 tomatoes, roughly chopped
  • 150 g Cheddar cheese, freshly grated
  • 100 g Parmesan cheese, freshly grated
  • a few sprigs fresh thyme, leaves picked
  • 2 splashes Worcestershire sauce, optional
  • 1 grating nutmeg, optional
  • 3 big handfuls fresh breadcrumbs
  • olive oil  
Instructions

1. Boil a pot of salted water.

2. In a pan, melt the butter over low heat, add the flour and turn the heat up to medium. Mix well till you get a paste.

3. Add all the sliced garlic to the paste and mix well. The garlic will caramelise and become golden brown and sticky. 

4. Next, add bay leaves and milk slowly to ensure you get a smooth sauce. Bring the mixture to boil and then leave it to simmer.

5. Preheat your oven to 220 degress Cels.

6. Add pasta to the boiling pot of water and cook according to the instructions on the packaging.

7. Season chopped tomatoes with salt and pepper.

8. Drained cooked pasta and add to the sauce. Stir in the cheese, chopped tomatoes, thyme leaves and a couple of dashes of Worchestershire sauce. A little nutmeg would be nice too but this is optional.

9. Transfer the pasta mixture into an ovenproof dish, srpinkle fresh breadcrumbs all over it and bake for 30 minutes. (This step is different to the original recipe!)

10. Serve while it's hot.


13 March 2014

Chicken, Leek & Potato Soup

I’ve been trying to fight off a bothersome cold since last Thursday without any medication. Although my midwife said I could take one paracetamol pill to ease off the symptoms, I’ve been rather reluctant to do so. Instead, I’ve been drinking lots of water and honey. I don’t even remember the last time I was ill. Probably a few years back? Daniel was beginning to think that I could never ever fall sick because even when he did, I was never affected. I suppose it’s true that the pregnant body automatically shields the baby from all “harm” and poor mummy takes all the crap! I’d rather it be this way, honestly.

20140313-075313.jpg
 
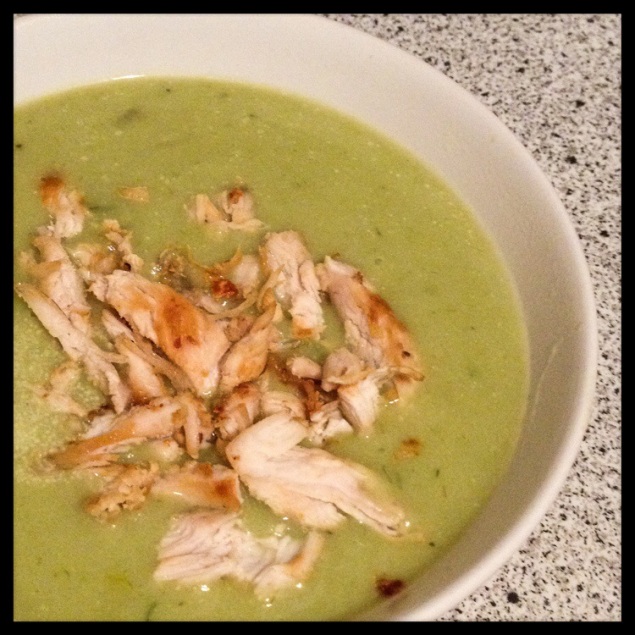
Thankfully I haven’t lost any appetite, however I’m never quite close to saying I’m hungry either now that I’m sick. Therefore I need to remind myself to eat or else I could very well just be drinking honey water all day. Despite the warm sunshine outside, I made us a typical wintry soup – chicken, leek and potato. The original recipe called for bacon but I thought pan-fried chicken was the healthier option. I also added an extra potato to create a thicker texture to the soup.

I really like leeks so the flavour was great for me without having to add too much vegetable stock. Also, as the texture was rather rich, it served well as a meal by itself with a bread roll or two. It is definitely one of our favourite homemade soups! I’ll have to cook up a batch of it and freeze it before Theodore arrives!

5 March 2014

Thai Green Curry

The great thing about curries is they are so versatile. Unless you’re particular about what makes an authentic Thai curry, I reckon you’ll be happy to use whatever’s in your fridge to cook up a storm.

20140305-200810.jpg


A mid week curry is a brilliant way to add a little fire to our tongues. The last time I made green curry was in my first trimester and I just couldn’t stand its pungent smell. Although I’m one of the few lucky ones to not suffer any morning sickness, I had a heightened sense of smell which meant plain rice/ Chinese porridge was all I could stomach. Therefore I’m really glad to be able to enjoy a curry now.

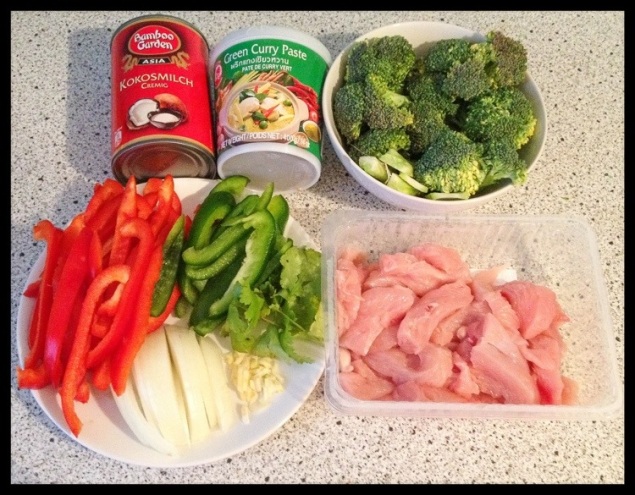
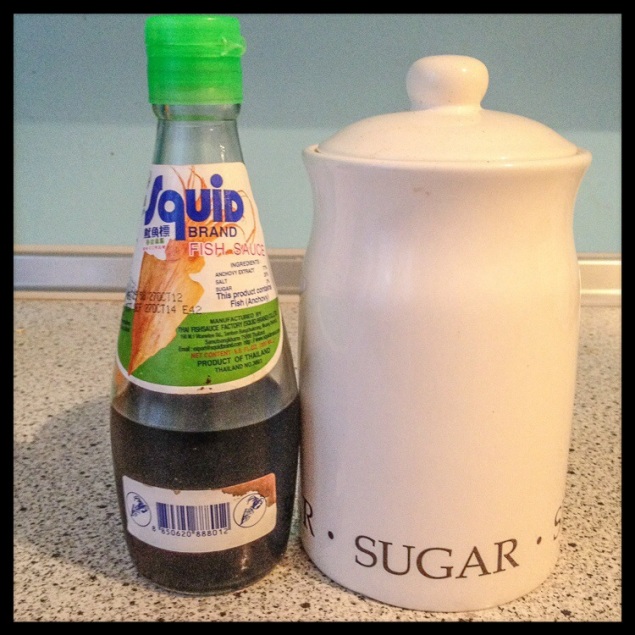
Here are the ingredients I used.

20140305-201125.jpg

20140305-201320.jpg


400g chicken breasts
400ml Coconut milk
2 tbsp Thai green curry paste
1 broccoli
1 garlic clove
Half an onion, sliced
Half a red pepper
Half a green pepper
Some coriander (to garnish at the end)
2 tbsp Fish sauce (optional)
2 tbsp sugar


Method

1. Heat a little oil in a wok and put in the garlic and onions. Cook till fragrant. Remember to toss the ingredients quickly to ensure they don’t burn.

2. Add the curry paste and fry it for 2-3 minutes.


3. Add the chicken and make sure that it is well coated by the paste and fry till light brown.


4. Add coconut milk and cook on medium heat for 15 minutes.


5. Throw in the broccoli, and half the peppers (both red and green). The remaining peppers will be added at the end to garnish the dish. Cook for 5-8 minutes till the vegetables soften.


6. Now, add the sugar and fish sauce. You can either add more or less sugar depending on how sweet you want your curry to be.


7. Take the pot off the stove.


8. Dish up and garnish with coriander and peppers.


I usually cook Thai curries with aubergines and carrots but I didn’t have any of those in the fridge. That didn’t stop me from making a mouth-watering, satisfying curry. Cooking isn’t set in stone so, just use your best judgment and have fun in the kitchen.

For those who prefer an alternative curry, do check out my Red Thai Curry recipe!

4 March 2014

Vanilla Fairy Cupcakes with a Surprise

Our kitchen is tiny and has limited storage space. With a baby on his way, I had to clear a couple of shelves to store some of his essentials. Therefore, I decided to bake Vanilla Fairy Cupcakes with Chocolate Frosting.

Vanilla Fairy Cupcakes with Chocolate Frosting

I adapted the recipe by adding half a teaspoon of Nutella in each of the cupcakes. That’s the surprise by the way. Daniel doesn’t eat Nutella but when he bit into it he thought it was regular chocolate! The cupcakes were so easy to make as BBC Good Food intended to target kids with this recipe. They turned out light and fluffy, just the way a good fairy cupcake should be. No fuss whatsoever.

Vanilla Fairy Cupcakes with Chocolate Frosting

With some leftover chocolates in the cupboard, I made chocolate frosting using the recipe from Dad’s Chocolate Drop Cakes. The frosting complimented the Vanilla Fairy Cupcakes superbly! It’s bound to be a winner with chocolate lovers out there. Oh, a little frosting goes a long way so don’t go crazy with it!
Since they are fairy cupcakes, I made them pretty by adding colourful sprinkles. Awww… I love how each of them looked – so dainty and graceful!

The usual protocol when it comes to baking is that I’ll keep a couple of slices for ourselves and the rest will be shared with Daniel’s colleagues. I do hope the men in his team won’t find these little fairies too girlish for their liking!